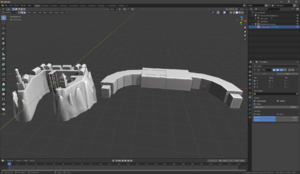
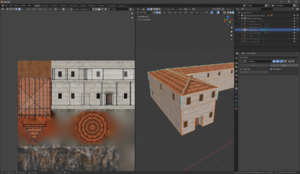
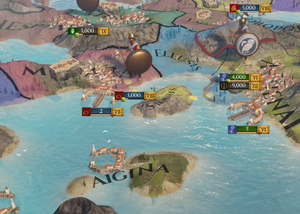
Imperator: Rome uses 3d models to represent objects in the game such as portraits, units and cities, as well as map objects such as trees. This guide is intended to help Imperator modders with some existing knowledge of 3d modelling and materials. To create a 3d model, you will need modelling software like Autodesk Maya or Blender. You will also need an addon to import and export Imperator models. To create a texture, you will need image-editing software like Adobe Photoshop or GIMP with an addon to import and export to the DDS image format.
Overview
All models and their respective textures and animations can be found in /ImperatorRome/gfx/models/
A typical model will have the following files:
- <model>.mesh - The 3d model itself.
- <model>.asset - The script adding the model to the game.
- <model>_diffuse.dds - The diffuse texture for the model.
- <model>_normal.dds - A normal map texture.
- <model>_properties.dds - A joint texture with specular, metalness and roughness.
Tutorial: Creating a 3d model
Tools
These are the tools necessary to 3d model for Imperator.
- Blender. A free program used to create 3d models.
- IO PDX Mesh addon. An addon that can be installed to Blender or Autodesk Maya. Installation instructions on their page.
Design
Open Blender and import a model that is like your project. This will give the correct scale of the model and enough detail to aim for.
A modeller can block in the general shapes of the building before creating anything detailed. For a building this would be the building's foundation and some big boxes to stand in for each building on top.
Some parts of a model are symmetrical or have repeating parts. To save time and effort use a mirror modifier on half of an object like a human, animal or building. Duplicate or clone objects like pillars, chimneys or windows. Apply the modifier to edit the other side.
Detail
Below is an image of a finished object. The light blue edges are marked to split. Without splitting edges of the model, in game it would be a mess of smooth object faces. While creating the model, set it to shade smooth.
In Blender click the Object menu and then click Shade Smooth.
UV unwrapping
Mark UV seams and unwrap the model.
UV seams separate parts of the model when unwrapping it. To create a UV seam, select the edge and then click the Edge menu and then click Mark Seam.
To UV unwrap a building with four walls either separate every wall, resulting in four walls on the texture. Otherwise mark one edge as a UV seam and the result will be a continuous and connected wall on the texture.
When marking UV seams, guess and check what it looks like. Import the texture so you can check your UV or imagine how you will make the texture based on it.
Locators
Use locators for graphical effects like fire for braziers and to position ships in ports. In Blender use an Empty and name it something useful.
A port 3d model for Imperator needs an Empty named ship_locator to place the ship. Scale it to 0.2. Although, note that the IO PDX Mesh exporter currently does not support scaled Empty – Plain Axes as ship_locators because the exported locator does not save its scale. For a future version this may be fixed.
Preparation and export
Copy the model from your working Blender document to a new Blender document used for exporting the model. Then apply all modifiers and join all objects that use a single material together. In Blender that is with Ctrl J with the objects selected. Apply a Triangulate modifier.
In the IO PDX Mesh menu under Setup choose imperator_rome. Then under Tools create a new PDX material. Choose the standard_snow Shader Preset. Apply the material to the model and add the textures.
Name all model objects to something useful.
Now the model is ready to export.
Asset
Copy an existing .asset file from another Imperator model. Rename it with the name of your model.
For example, yours may be a port, copy /ImperatorRome/gfx/models/buildings/eastern_port/eastern_port.asset
Here is the example code for a new Athenian port.
pdxmesh = {
    name = "athens_port_mesh" # "<model name>_mesh"
    file = "athens_port.mesh" # "<model name>.mesh"

    meshsettings = {
        name = "athens_port" # "<object name in model>"
        index = 0
        texture_diffuse = "greek_port_diffuse.dds"
        texture_normal = "greek_port_normal.dds"
        texture_specular = "greek_port_properties.dds"
        shader = "standard_snow"
        shader_file = "gfx/FX/pdxmesh.shader"
    }
}

entity = {
    name = "athenian_port_entity" # "<graphical culture type>_entity"
    pdxmesh = "athens_port_mesh" # "<model name>_mesh"
}
| 文档 | 效果指令 • 触发条件 • 修正列表 • 作用域 • 变量 • 数据类型 • 本地化 • 可自定义的本地化 |
| 脚本 | AI • 建筑 • 宣战理由 • 人物 • 人物互动 • 战术 • 国家 • 文化 • 决议 • Defines • 经济政策 • 事件 • 渊源 • 政府 • 总督政策 • 理念 • 修正 • 军事传统 • 官职 • 行动 • 派系 • 价格 • 人口 • 宗教 • 省份 • Script Values • Scripted Modifiers • 附属国类型 • 科技 • 商品 • 特质 • 单位 |
| 地图 | 地图 • 地形 • 地图定位器 |
| 图形 | 3D模型 • 界面 • 盾徽 • 图形资产 • 字体 • 粒子效果 • 着色器 • 单位模型 |
| 音频 | 音乐 • 音效 |
| 其他 | 控制台命令 • 校验和 • 模组结构 • 错误调试 |


